Versions Compared

Key

  • This line was added.
  • This line was removed.
  • Formatting was changed.

Once the Font Audit step has been performed, the next step is Activate and Normalize. In this step, eXtyles activates your document (allows it to be processed) and normalizes it (prepares it for processing). The Activate and Normalize function follows these steps, some of which are automatic:

  1. Save a baseline copy of the document (an automatic operation)
  2. Document preparation (an automated and, in some cases, interactive operation)
  3. Set document information (an interactive operation)


Note

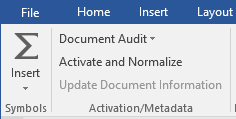
Before you select the Activate and Normalize function, only the options Document Audit, About eXtyles®, and Activate and Normalize are available in the eXtyles ribbon.


Panel

On this page

Table of Contents
printablefalse

Preparing your document

Child pages (Children Display)
depth2
pagePreparing your document


How to Use Activate and Normalize

  1. Select Activate and Normalize from the eXtyles ribbon
  2. Enter your document's metadata in the Document Information dialog (see Setting Document Information below)
  3. Click OK. eXtyles will perform some automatic steps to prepare your document for eXtyles processing.

After the Activation and Normalization stage is complete, the remaining selections of the eXtyles menu are enabled.

Activation and Normalization Process

Save a Baseline Copy

When you select the Activate and Normalize function, eXtyles automatically saves a baseline copy of the document in native Word format in the same directory in which the original document is located. The baseline document is saved with the name [document]$base.doc, where [document] is the original document’s filename.

If the original document is not in native Word format—that is, it is not a .doc or .docx file—eXtyles prompts you to save the document as a Word file before continuing. After you save the document in native Word format, eXtyles creates the baseline copy automatically.

If you want to create additional baseline documents later in the eXtyles process, you can use the Create New Baseline function to create additional copies of the document; see “Create New Baseline.”

Warning

Never edit or manually modify [document]$base.doc. If you open this baseline document, you will be prompted to open it in read-only mode. Make sure to choose “read-only” when opening the document so that it cannot be edited or modified.


Document Preparation

After the baseline document has been saved, eXtyles automatically normalizes your document (performs initial document preparation), which includes the following operations:

  1. Accept all changes if Track Changes was turned on, and then turn off Track Changes
  2. Normalize font-offset combinations for special characters
  3. Apply a temporary monospace-font paragraph style to paragraphs that are entirely in a monospace font but not in a monospace-font paragraph style; this step allows flexibility during the Cleanup stage. See the section “Cleanup” for more information.
  4. Remove unnecessary author formatting (such as font size and font color changes)
  5. Footnotes and endnotes are unlinked and converted to plain text.

Additional document preparation steps might be necessary before other eXtyles functions can be executed. Typically, tables that are set as text rather than using Word’s table editor require preparation and cleanup prior to Activation and Normalization.

Tip

Activation can provide additional document cleanup by removing all unused character and paragraph styles. Hold the Shift key and press OK on the Document Information Dialog to open the Remove Unused Styles optional dialog, and select Yes to remove unused styles. This feature can be used to Activate problematic Word documents that contain a large number of styles

Setting Document Information

In addition to these automatic background steps, when you select the Activate and Normalize function from the eXtyles menu, eXtyles displays the Document Information dialog.

Use this dialog to provide data about the document to eXtyles and select the style template to be used with the document. eXtyles saves and maintains this document-specific information with the document.

  1. Select the desired Publisher Configuration and Publication from the drop-down lists. These selections specify the style template that is attached to the document being processed. Each template contains a collection of styles specific to the publication and publisher. These settings also control the list of active dictionaries for the Auto-Redact operation and the reference template used during reference processing.

  2. Enter other information in the appropriate fields. Pay special attention to required fields indicated by asterisks (*), such as Article Type and Article ID.

  3. If you want to replace the current document header and footer with the information collected in the Document Information dialog, check the Add Document Information to Header box. Dialog information is placed in several lines in the document header; page numbers in the form “page X of Y” are placed in the document footer. If the box is not checked, the header and footer are left as the author typed them.

  4. Click OK to save the document-specific information.

You can change the document information at any time by selecting Update Document Information from the eXtyles menu/ribbon.

Tip

Document metadata stored in a web-based database or in an external transmittal file can be automatically imported during the Activation and Normalization phase using the Metadata Browse/Import feature.


Troubleshooting

If eXtyles freezes or has dramatically changed your document during the Activation and Normalization process, please contact eXtyles-support@inera.com. Common solutions for "difficult documents" can be found in the eXtyles FAQ.